Building a Simple Blog with GatsbyJS and Netlify CMS
published onJanuary 20, 2020
0views
3minutes read
With the advancing technology in the development of website applications, many developers are racing to create frameworks that can facilitate building a website quickly, easily, and professionally. The same goes for the extensive tutorial I will present on using the GatsbyJS framework and integrating it with Netlify CMS to create a simple yet professionally styled web blog application.
⚙ Tools
- Code Editor (Here I am using Visual Studio Code): https://code.visualstudio.com/
- NodeJS: https://nodejs.org/en/download/
- Git Bash: https://git-scm.com/downloads
- Coffee & Cigarettes: buy your own
📓 References & Documentation
- ReactJS (Because GatsbyJS is built under the ReactJS framework): https://reactjs.org/docs/getting-started.html
- GatsbyJS: https://www.gatsbyjs.com/docs/
- Netlify CMS: https://www.netlifycms.org/docs/intro/
- Bootstrap 4.5: https://getbootstrap.com/docs/4.5/getting-started/introduction/
- React-Bootstrap: https://react-bootstrap.github.io/getting-started/introduction
Installing Gatsby-Starter with NPM & Gatsby CLI
I assume that you already understand how the terminal works because here I use Git Bash to install node modules. Also, make sure that NodeJS is installed on your device. If it is, the first step is to install the node module :
After Gatsby CLI is installed, it's time to fetch the Gatsby Starter repository that is clean for easier configuration. Below is the repository and steps I use:

We can see the arrangement of files and folders obtained from the newly fetched gatsby-starter. These can be combined as desired. However, since Gatsby is a derivative of ReactJS, we will use React to create each component.
Here is the directory structure in the src and static folders that I created, and I will briefly explain their functions:

- (contains assets such as images, fonts, PDFs, etc., to support development)
- (contains main components like the main layout, SEO React-Helmet, Post, etc.)
- (contains main files that will be automatically generated, such as index, contact, about, 404, etc. Just create files with names like file-name.js, and you can access pages like this: http://localhost:8000/file-name)
- (contains small components that will be used by main components in the components folder, such as header, footer, sidebar, etc.)
- (contains style library files; since I use SASS, I created index.sass that imports many styles for each component)
- (here we will create some template files whose functions I will explain in the next section)
- (contains supporting utility files such as number formatting, slugify, date formatting)
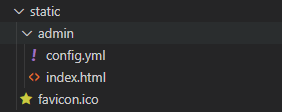
In the static folder, we will create folders and files that will be used for NetlifyCMS development. Here, I will not provide a detailed explanation of how I created the frontend UI of the blog, but I will give a bit of configuration for Gatsby that we will integrate with NetlifyCMS later.
Installing Supporting Modules
To build a web application using Gatsby, and if we use the super starter boilerplate, we must also install some essential modules and supporting modules that will be used during development of the web application. The following are the modules I install:
After all these modules are successfully installed, we proceed to make some configurations on Gatsby so that the blog functions on our website can be used.
GatsbyJS Configuration
The initial step is to configure the file, where in this file, we will add some metadata as well as plugins and import modules that we will use.
Here, I added metadata information to improve the SEO of the Gatsby web we are building. The metadata structure applied here is still simple, and you can add other information as needed. In the plugin section, we will include the plugins that we will use later.
Since we have installed the modules, it's time to include the plugins we will use. Important plugins should be listed at the beginning for easier readability, such as the plugin, which functions as sourcing local data that will be used or displayed on our Gatsby application. For example:
As seen in lines 5, 12, 19, we include the names of the modules we will use, i.e., , followed by the option path indicating that all files in that directory will be read by Gatsby and processed later, such as markdown blog posts and assets like images, icons, etc.
If there are other directories to add, simply add configuration lines as before.
In this project, I chose the plugin as the responsive image plugin, which will be used to display thumbnails or post images on our Gatsby blog. Also, I added some other plugins like , , , etc. With this, the configuration in is complete, and we move on to the next section.
If you want to add Disqus Comments to your blog, don't forget to add the to your Gatsby configuration. The shortname shown in the image below is the shortname of your Disqus server. You can create one here.
The next step is to configure the file. In the gatsby-starter boilerplate, this file is not created yet, so we create a file in the root folder named . The purpose of is to process the Gatsby Node API, such as creating pages dynamically, adding nodes for GraphQL, or responding to events during the build lifecycle. Since I am creating a simple blog here, I just need to add some configurations.
Here, I only create the event to dynamically generate post pages. Therefore, we will create a file named in the directory, as explained above, and it will contain the template view.
Creating UI Components
- Layout.js, This layout will call Header, Footer, and children. It will be called every time we create pages, and template pages will also use this Layout Component. I leave the Navbar, Footer, & Sidebar components to you so that you can customize them as you like 😄.
- Post.js, In this Post component, we create the view for a single post. It will be looped in , and here we will create a component that will return several props. Each prop will be taken from the GraphQL Query we will create in .
- PostsCard.js, Here, I create a loop of cards from the previously created Post component. Later, we will place this PostsCard in the index or tags template.
- index.js, Here, we will call the main components we created earlier, such as Layout, PostsCard, SEO, etc. Also, we declare the GraphQL Query because in this component, we will pass all the props to PostsCard and fill them with post data later.
- utilityFunction.js, Here, I provide supporting utility scripts for slug format and truncate to limit the description in .
Creating Page Templates
In this section, the process is actually the same as creating the previous components. We will pass data from props, and the data will be provided by the GraphQL query. Here, I will only create two templates: Bio and Post.
- postTemplate.js, This component will be somewhat complex because we will pass all our post data here. I also added Disqus Comment here since Gatsby Build will actually display static pages.
- bioTemplate.js, I kept it simple here because it will only display our profile or About Us page. Later, this template can be customized in the Netlify CMS panel.
NetlifyCMS Configuration
The configuration here is actually easy but may be a bit tricky for those who often develop with GatsbyJS but don't pay attention to each markdown variable created, as well as an unorganized directory structure. We will create a file named in the folder we created earlier. Here is the configuration I use:
Next is to add configuration for collections. Here we will define configurations for writing posts in Netlify CMS and createPages (specifically for the bio) that we created in .
Now, let me explain a bit about each field in the collection. In the blog collection, some of them have explanations in the lines (check the image above), and in the fields line, there are several labels that will create and read our post markdown files such as path, title, description, date, author, thumbnail, and post body.
For the pages collection, we create a markdown that will be passed its props and will be created into an About Us page. In this configuration, you can be creative and adjust it according to your preferences. Here is an example of a post markdown and an about us markdown that will be generated later:
After configuring the file, the next step is to create an file in the same folder where we saved , namely . Below is the script, along with the conditional logic for when the user is still logged into the Netlify CMS authentication that we created.
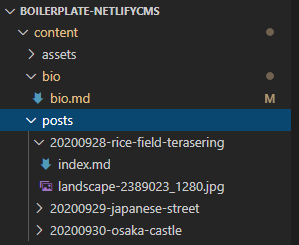
If you have completed these configurations, try creating a folder in the root of our project named . Inside it, there should be folders such as assets (containing optional files), bio (containing the bio markdown file), and posts (containing a folder for each post with its respective markdown file). You can see the hierarchy as shown in the image below:
Since I haven't created a conditional logic if there is no post yet, I suggest you create it to avoid displaying error messages when developing the project. The markdown file format can be seen in the image above (post and about us markdown). Just create at least one post and one bio markdown file. This step is now complete, and the next step is to test the development on your local device.
Gatsby Build Develop
To see the results of our work before, we can build the development version on our local device using the Gatsby-CLI syntax we installed earlier. Type the following syntax in your VS Code terminal:
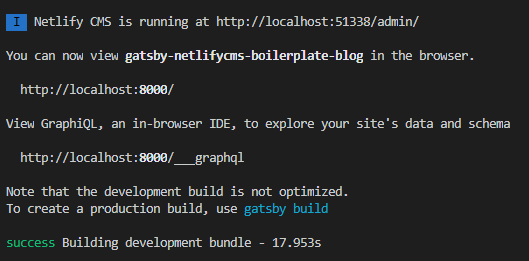
Here is the output that will appear after the Gatsby-CLI successfully processes the compile build of our project:
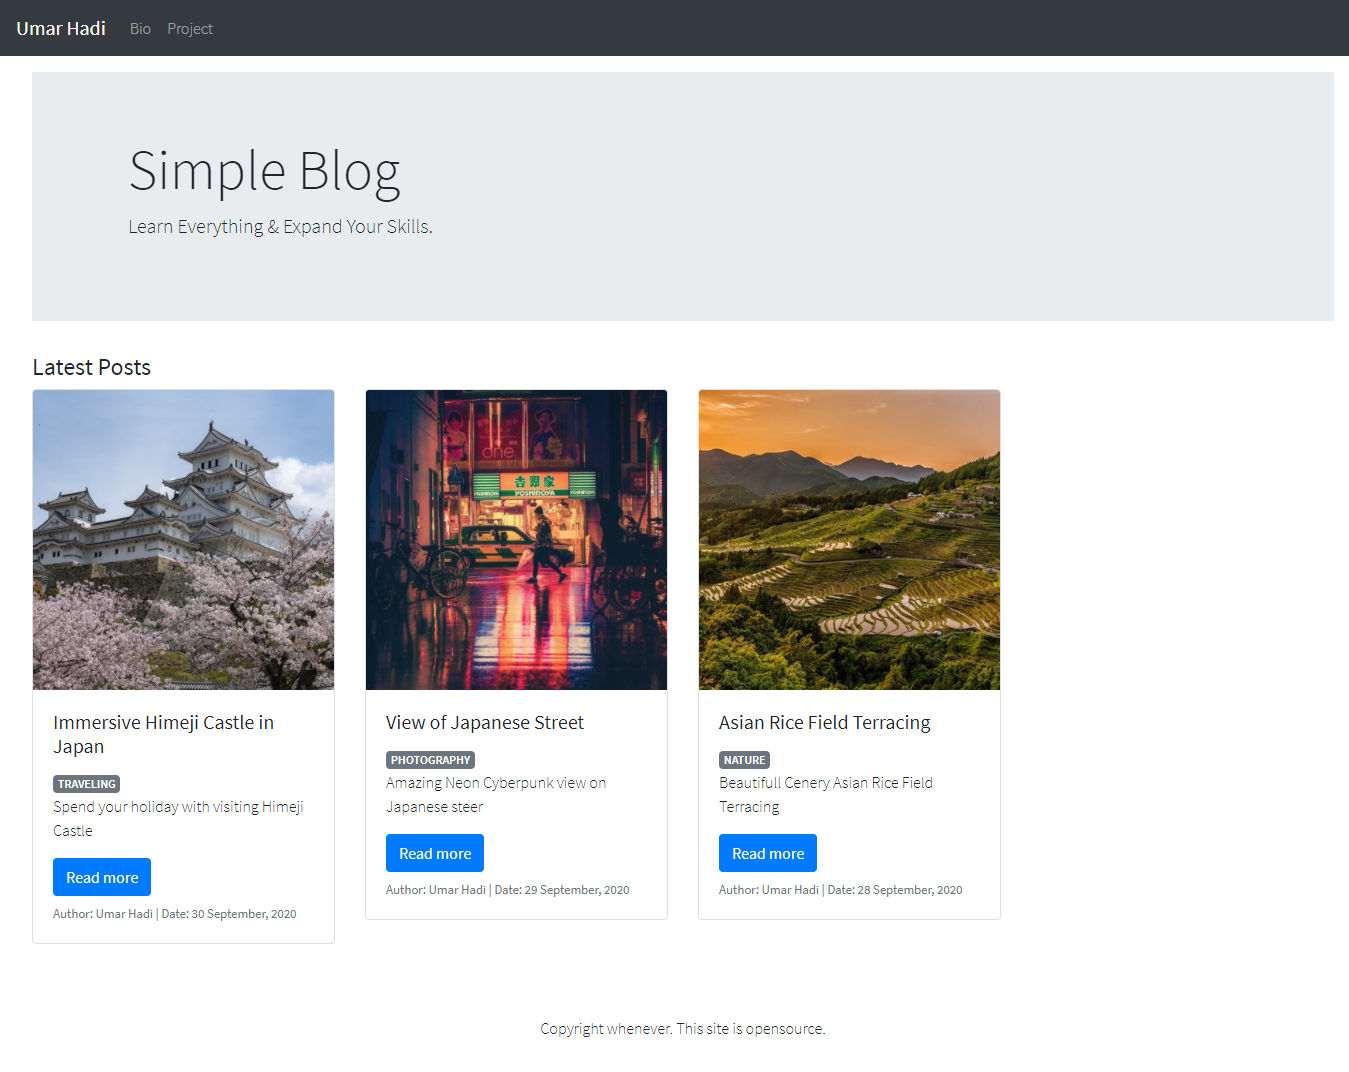
To see it, simply type the URL provided in your favorite web browser, and it will look like the following, as well as when you view the appearance of each blog post:


All components are neatly arranged and can be accessed for each post. Comments are already embedded in each post, and to check what comments have come to your website, you can view them on your Disqus admin panel.
Integrating Github with Netlify
To access our website publicly or from anywhere, we need a server. For deploying a static site like Gatsby, we can use Netlify, combining it with headless CMS technology or commonly known as Jamstack. For more information, you can check directly on their websites (Netlify & Jamstack).
Before deploying our project to Netlify, we need to upload our project to Github so that Netlify can fetch our project through the Github repository integration. Assuming you are familiar with uploading projects, I will guide you through deploying our project to Netlify until we can access the Netlify CMS post panel.

The first step is to access Netlify. You will log in using Github and select the repository you created earlier.
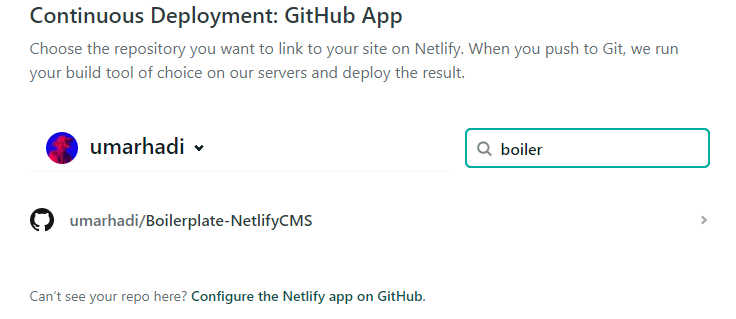
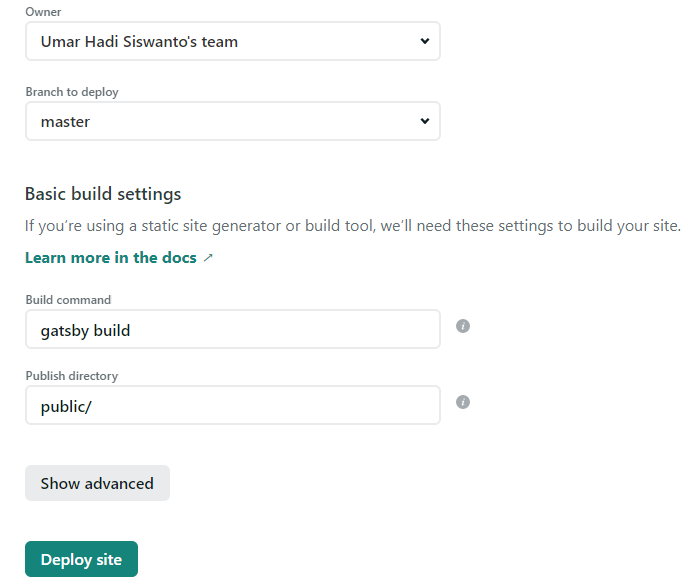
Here, I choose the repo I created with the name . Next, fill in some forms such as owner, main branch for production build, build command, and public folder for the publish directory, as shown in the image below. Lastly, press "Deploy site" to deploy our project.
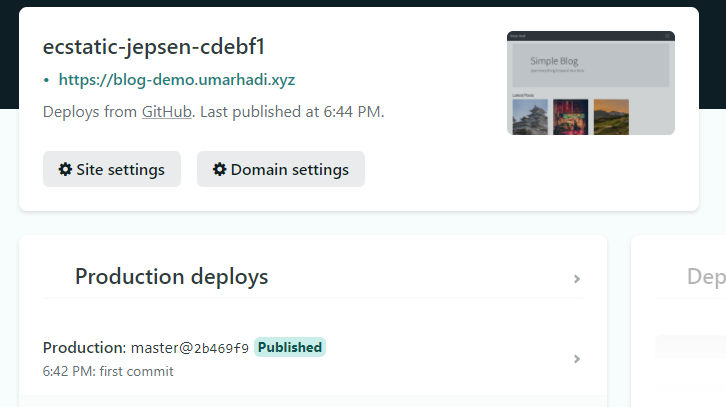
The next step is to wait for our project to finish building, and then access the URL created by Netlify. If the project is successfully built, it can be accessed.
Next is to activate Netlify identity, which includes add-ons like registration and git-gateway on Netlify so that our Netlify CMS can be accessed.

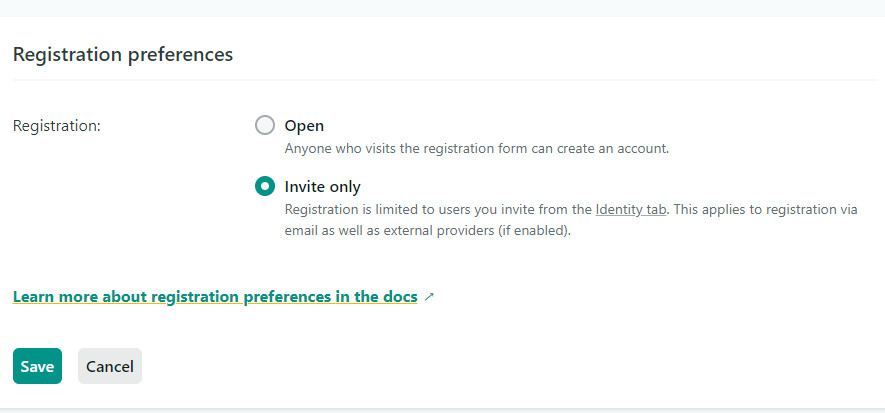
Here, I change it to invite-only to make sure only I can access the post panel. You can configure it according to your preference. Once you reach this step, all configurations are complete, and you can access your site.
Access Netlify CMS
The last step is to access the Netlify CMS admin panel, and you are free to post blogs in it. You can access the admin panel by adding to your domain, like this: . The login page will appear as shown below:

After logging in, you will see the Netlify CMS admin panel. You can start posting blogs in it. Access the admin panel by adding to your domain, like this: .

Congratulations! You have completed the long exercise of creating a simple blog using Gatsby and Netlify CMS with Jamstack technology. If you prefer not to build your blog from scratch as explained above, I have prepared a magical link for you. Just by accessing this link, you can create a copy of the boilerplate where you only need to do simple configurations, and voila, you can start using it.
Tags:
#Gatsby
#Jamstack
#Web Development